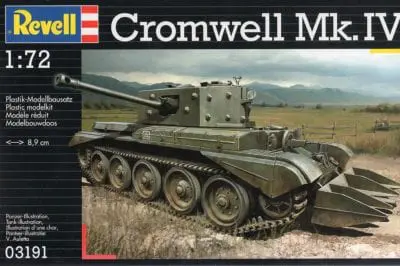
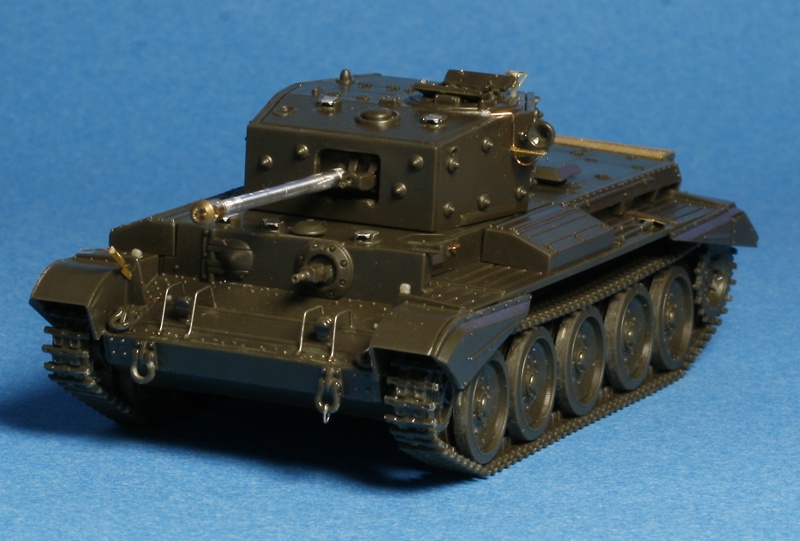
When I heard Revell reissued its Cromwell Mk IV in late 2012, I wanted to build one; this is one of their greatest kits and perhaps one of the best in 1/72 scale, every nut and bolt is in its place. I thought I could use a photo-etched set from Part, but this Cromwell is one of those rare kits so well detailed it makes the PE upgrade almost useless; some kit parts are even better than PE replacement options. The Aber gun barrel though is a nice addition.
The assembly of the kit is easy enough, but some special attention is required at several construction sequences; dry fitting and good reference photos makes this job a lot easier. For example, I hastily glued the rear hull plate only to find out it was too low. Luckily, only a couple a minutes passed and I was able to undo with minimum damage. I was not the only unfortunate who made this error, as I later discovered. That’s why a good research before every building is a must.
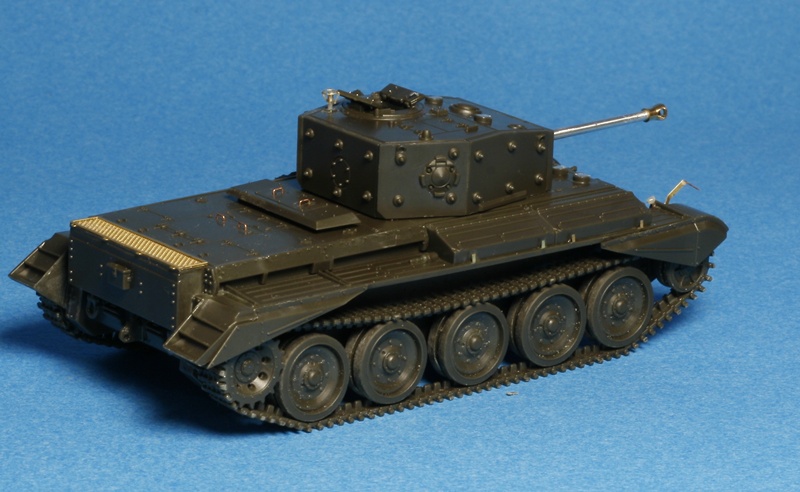
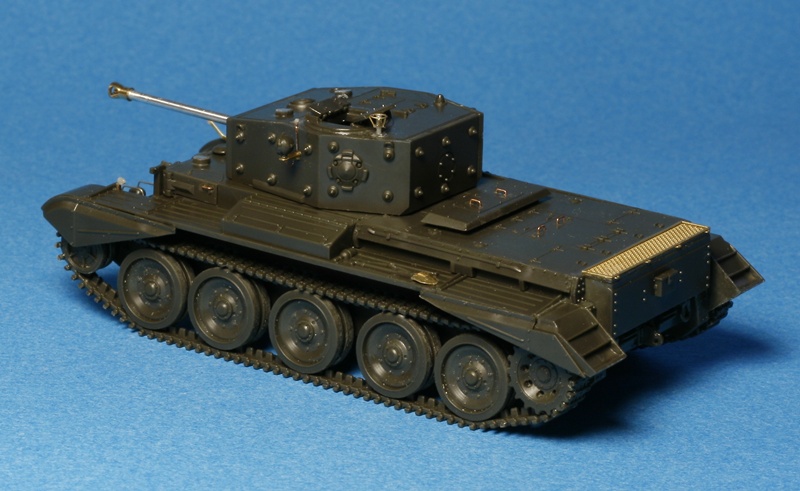
The tracks are Revell style: link & length type, with few longer sections, very well detailed on both sides. As I’ve learned from other builders of this kit, it is better to switch the top and the bottom sections, as the top section is a little longer and connects better with the other sections under the road-wheels. Cromwell doesn’t have return rollers, so you don’t have to worry about the track sag.
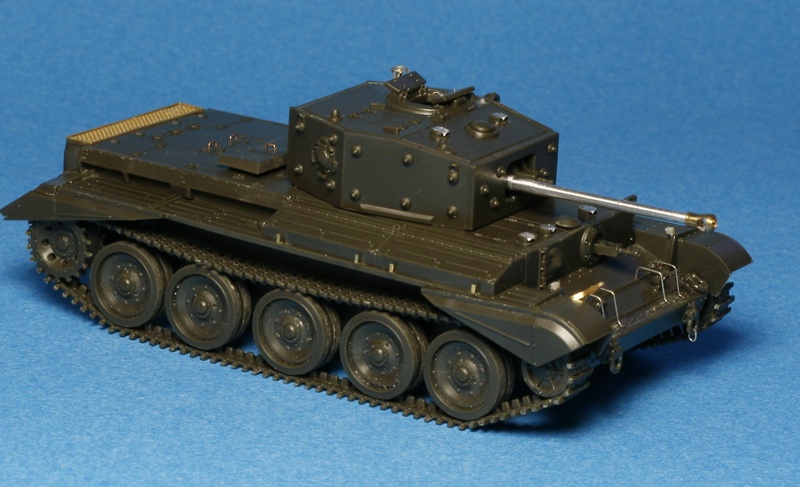
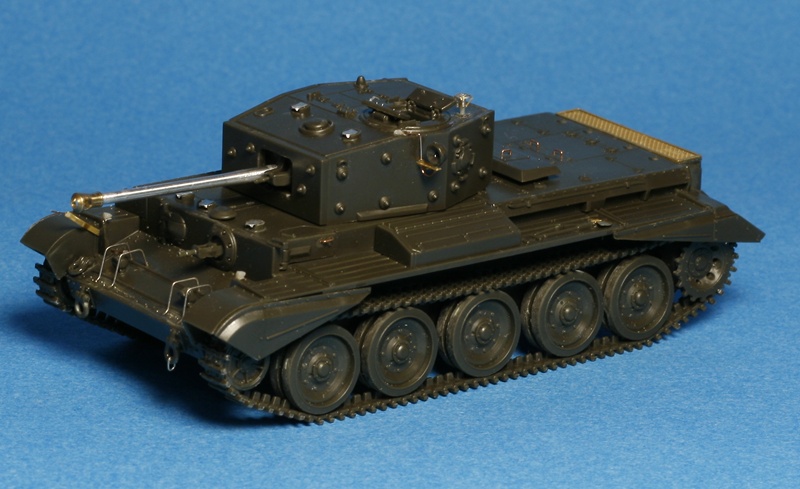
The turret is nicely done, with the bolted armour plates as separate parts. Only the commander hatch can be left open; I detailed it with eight bolts and the closing mechanism. Other additions were the antenna mount and the searchlight prop from the PE set, and the wirings of the searchlight. I also drilled both MG barrels and the searchlight to better represent the lenses and added periscope covers.
In my opinion, the only parts that are a little overscaled and need to be replaced are the front light guards. Just use the plastic part from the kit as template and bend an ordinary brass wire into shape. I also wanted to add the tow cables, as Revell didn’t provide it; at least I could use the plastic eye loops. However, I discovered the Cromwell towing cables were quite complex in reality, and very hard to replicate in 1/72 scale, so I gave up.; I scratched the supporting brackets of the cable, though.
One detail that I spotted on the reference photos and baffled my mind was the supporting arm mounted on the right front fender with a steel rod at its end. I find out it was some kind of an orientation device for the driver. A missing detail from the kit are the little fender headlights; I made them from styrene and added wirings. The side fenders and the running gear are not glued permanently, so I will be able to paint them more easily.
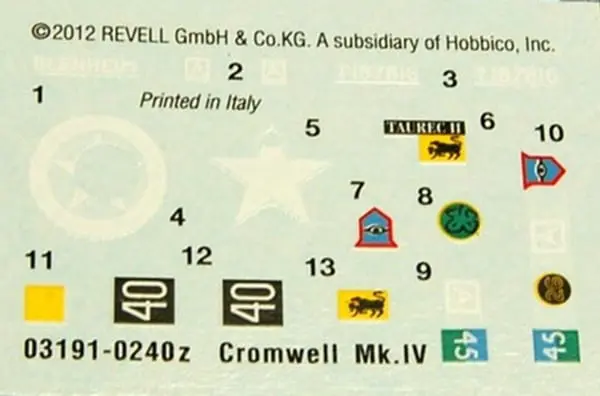
Revell changed the markings from the old decal sheet. The incorrect white “45” on a red square for the 11th Armoured Division is now replaced by a black “40” over white. I don’t know if this is correct, some modelers pointed out that a white “45” over green/blue is more historically accurate. The other marking is Cromwell Mk.IV of 2nd Squadron, 2nd Battalion, Reconnaissance Regiment of the Welsh Guards Armoured Division, Normandy, France, summer 1944.
In conclusion, this is an excellent kit, with lots of room for details, but easy to build just “out of the box”. Highly recommended!
For the finished model check here.